With Spring just around the corner (I think, but I live in Michigan, so we usually skip from Winter to Summer), it’s time to start thinking about changing up the decor around your house. It’s time to think light and bright decor colors.
I love to put together fun easy DIY ideas that will complement my table decor settings. I’ve been dabbling with using chalk in my decor DIY ideas, and I’m excited to share this one with you.
“Get your chalk on” with this easy DIY decor idea with just a few necessary supplies.
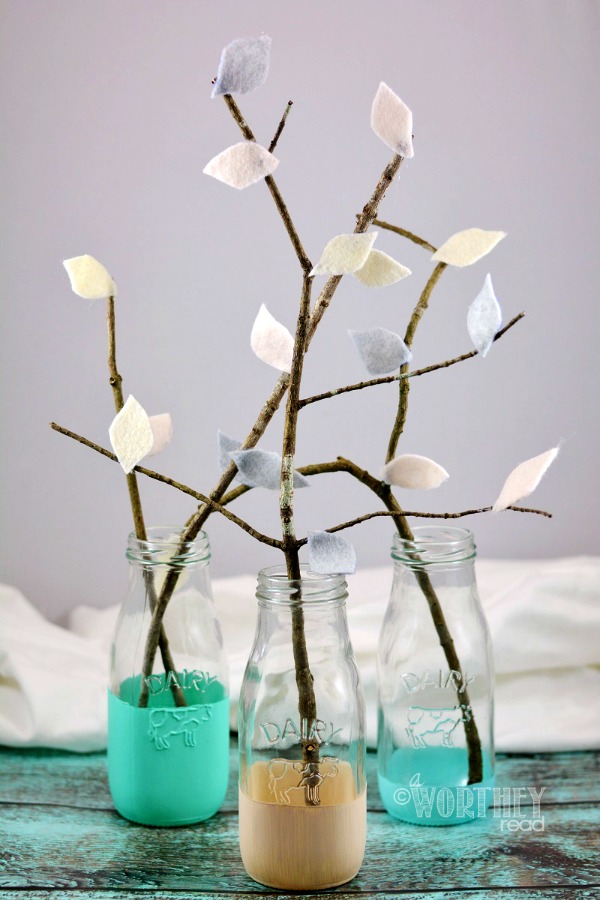
Easy DIY Idea: Chalk Paint Dipped Milk Jars
Materials needed to make this happen:
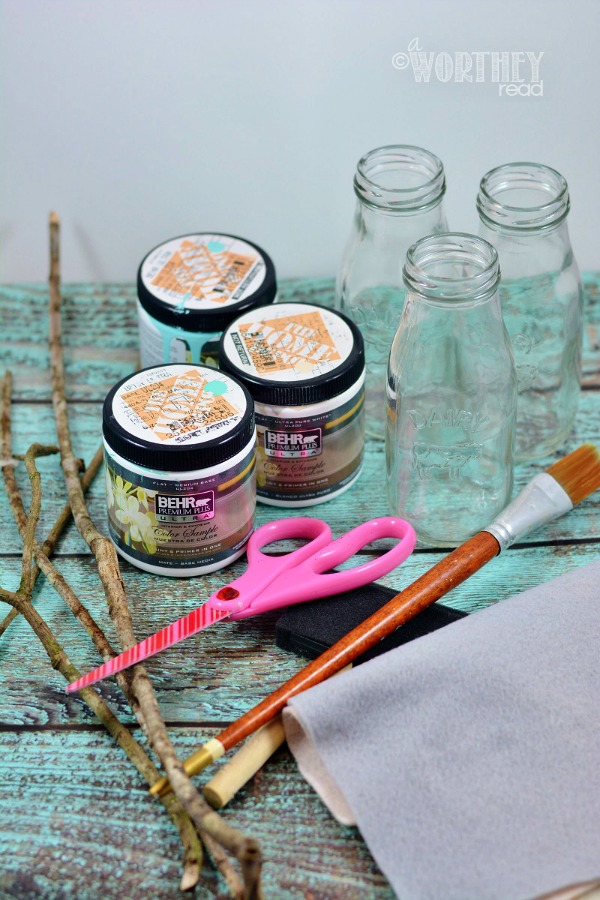
- Chalk Paint in your desired color(s)
- Milk Jars
- Twigs from outside
- Felt in your desired color(s)
- Scissors
- Hot glue gun
- Paint brush or blotter
- Masking or painter’s tape (optional)
Instructions:
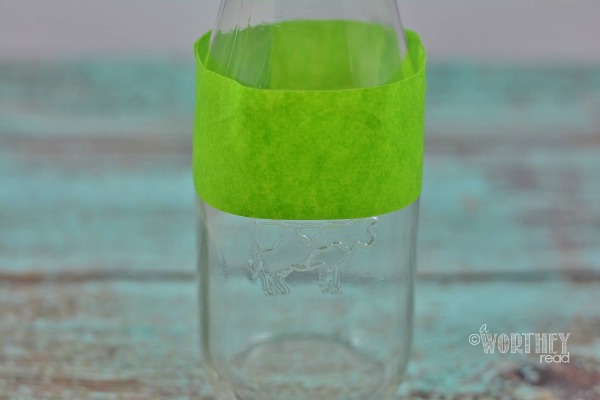
Step 1: Begin by painting your milk jars so they have time to dry while you prepare your felt leaves.
You can freehand paint for a more rustic look, or you can tape off the area you wish to paint with
masking tape or painter’s tape. We used Frog Tape and marked off different levels on each milk jar for a
varied look.
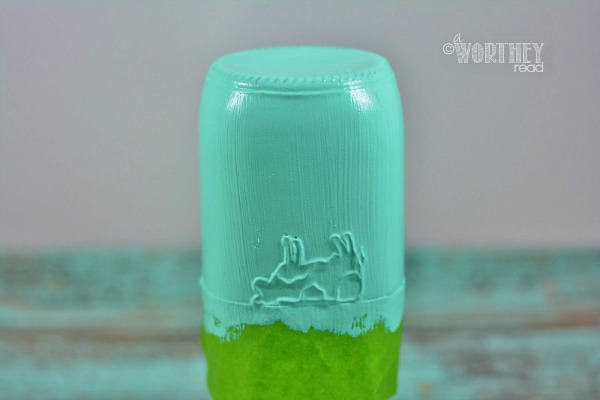
Step 2: Turn the milk jars upside down and allow them to dry.
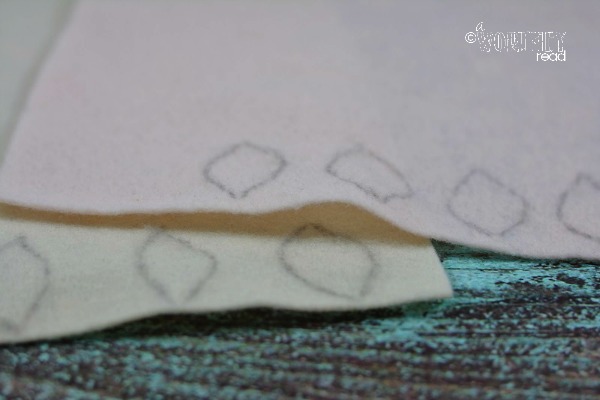
Step 3: Draw or trace some small leaf shaped on your felt.
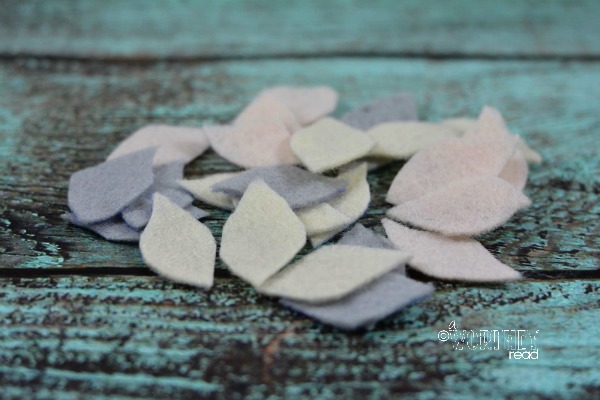
Step 4: Cut out the felt leaves.
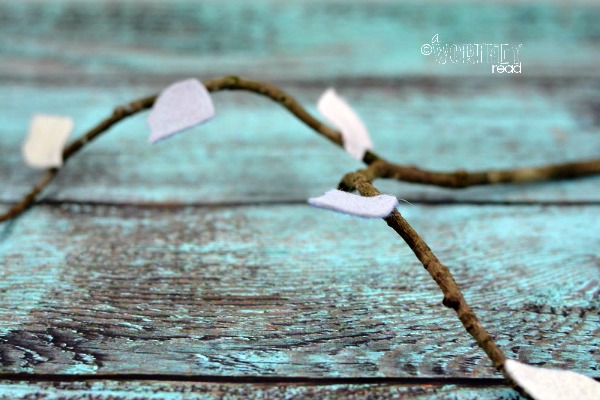
Step 5: Use a hot glue gun to adhere the leaves to twigs you have gathered from outside at different
intervals.
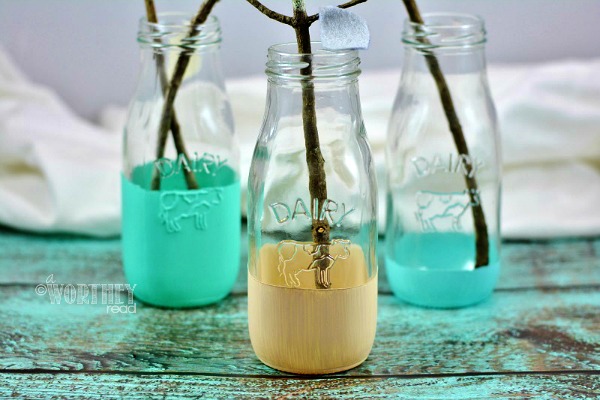
Step 6: When the milk jars have dried, remove the tape and clean up any areas that have bled through.
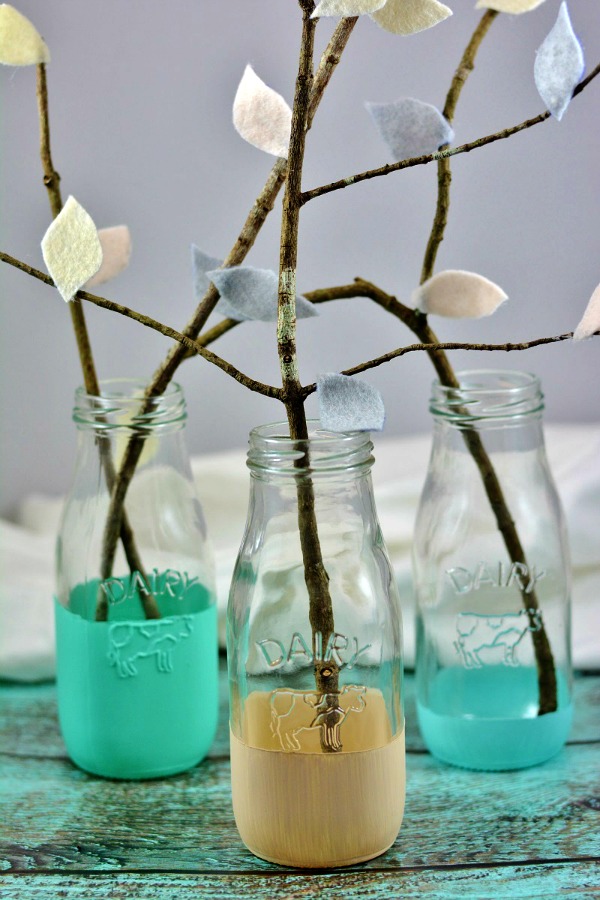
Place one or two twigs covered in felt leaves in each jar, and display.
Now, wasn’t that FUN! So go ahead, get your supplies and create this easy DIY idea!
If you do it, come back and let me know how it worked out for ya and where you displayed this at in your home!


Kelly | Typically Simple says
I love, love those milk jars…they are super cute! And the little felt leaves on the twigs really tie the whole project together! I’d love if you shared this at our Creative Inspiration party!
Cathy says
These turned out so cute – love them. Thank you for sharing them with Share It One More Time. Cathy
Cathy says
Love love this! Saying hello from moonlight & mason jars! I would love for you to share this at my link party Making Memories Mondays going on now!
Cathy
Juliana says
This looks so cute! I love the little leaves on the branches!
Marilyn says
Your milk bottles are so fun and I love the felt leaves on the branches. What a great touch! We featured you at The Project Stash so stop by tonight and pick up your featured button…you’ve earned it!