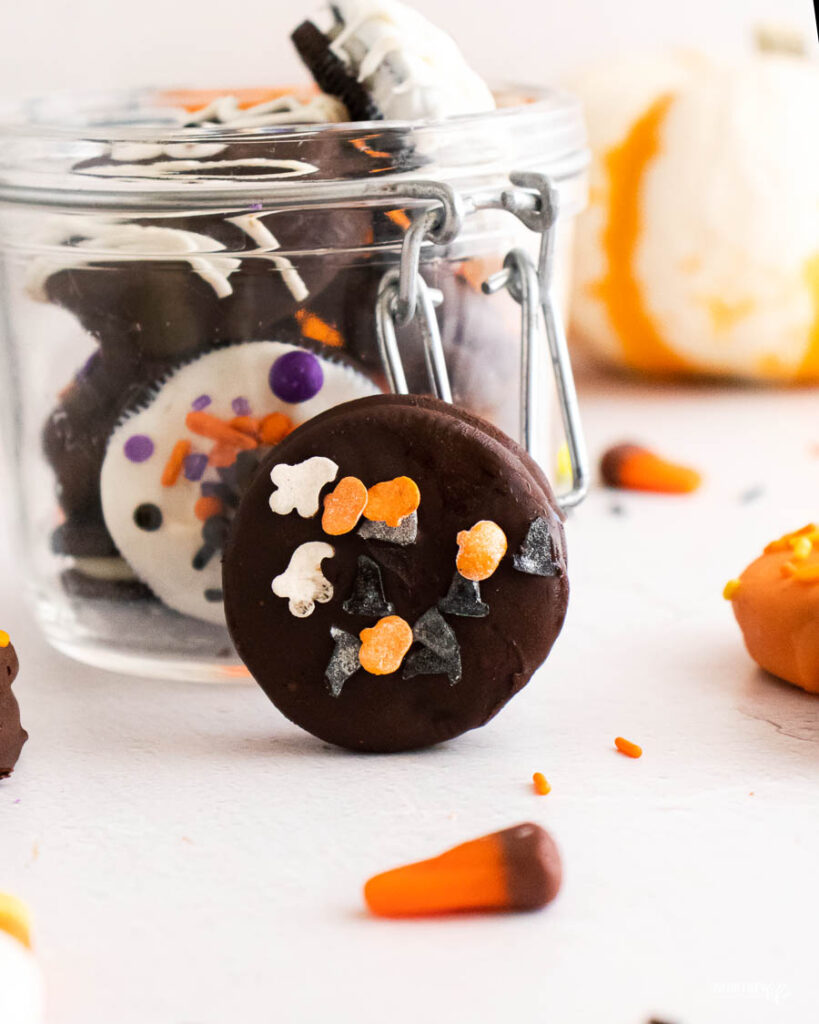
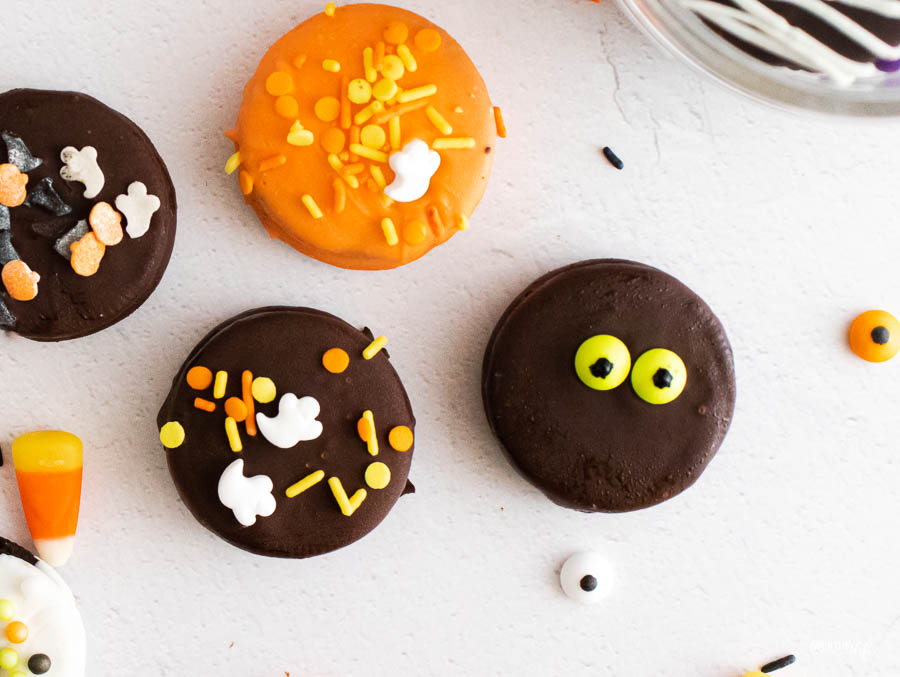
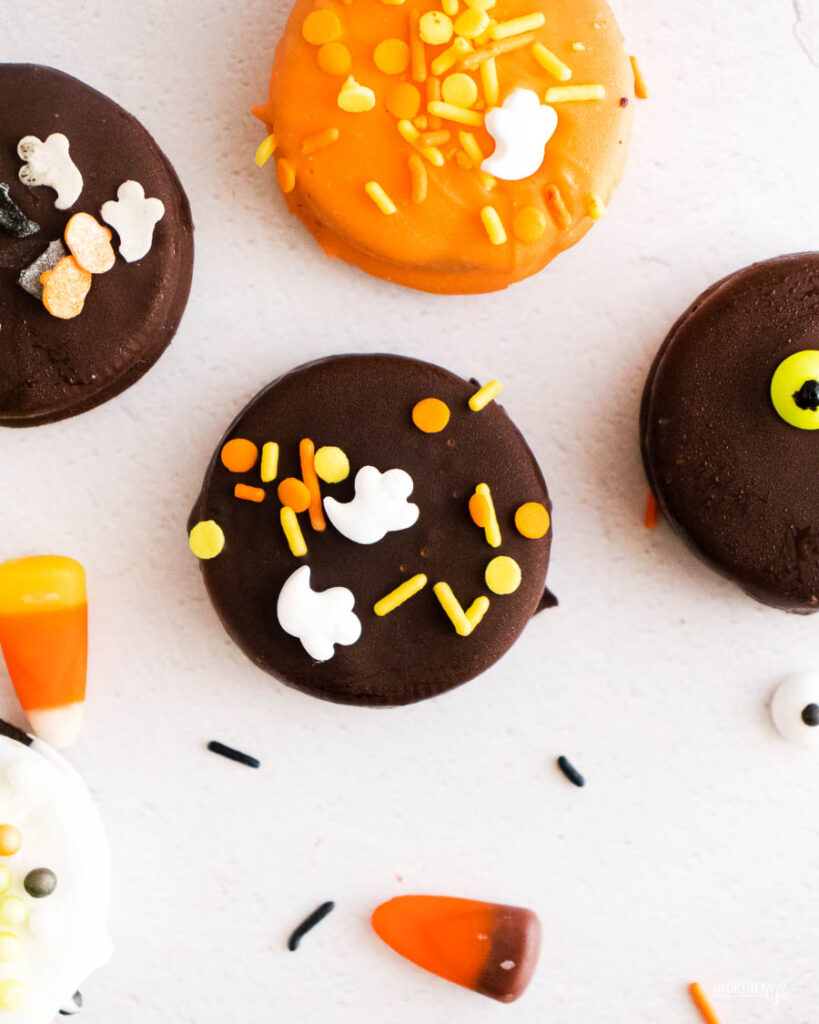
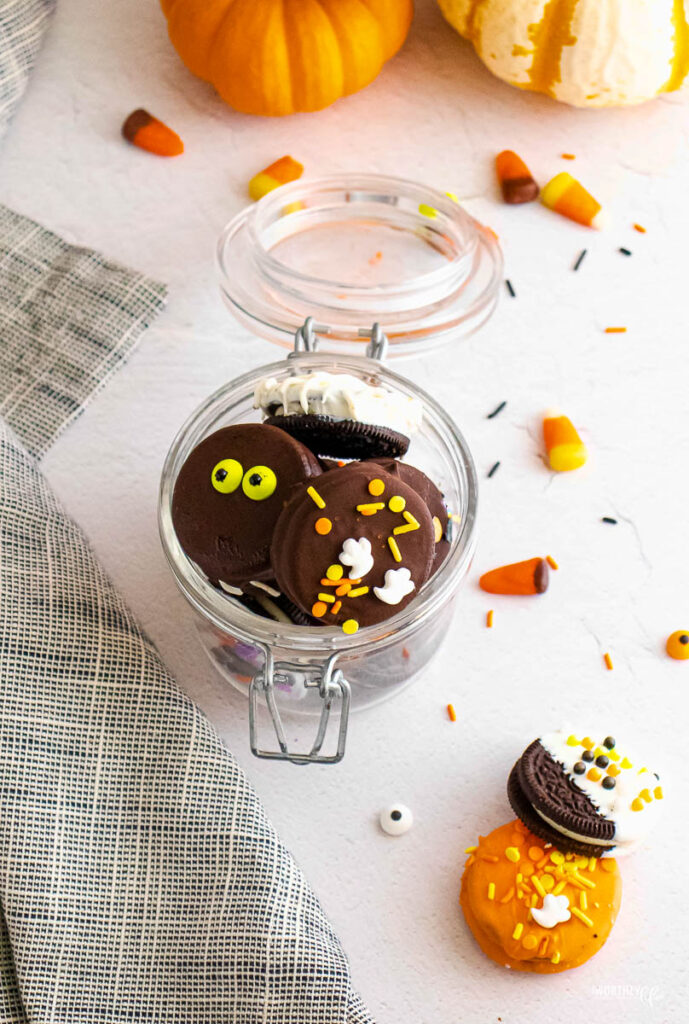
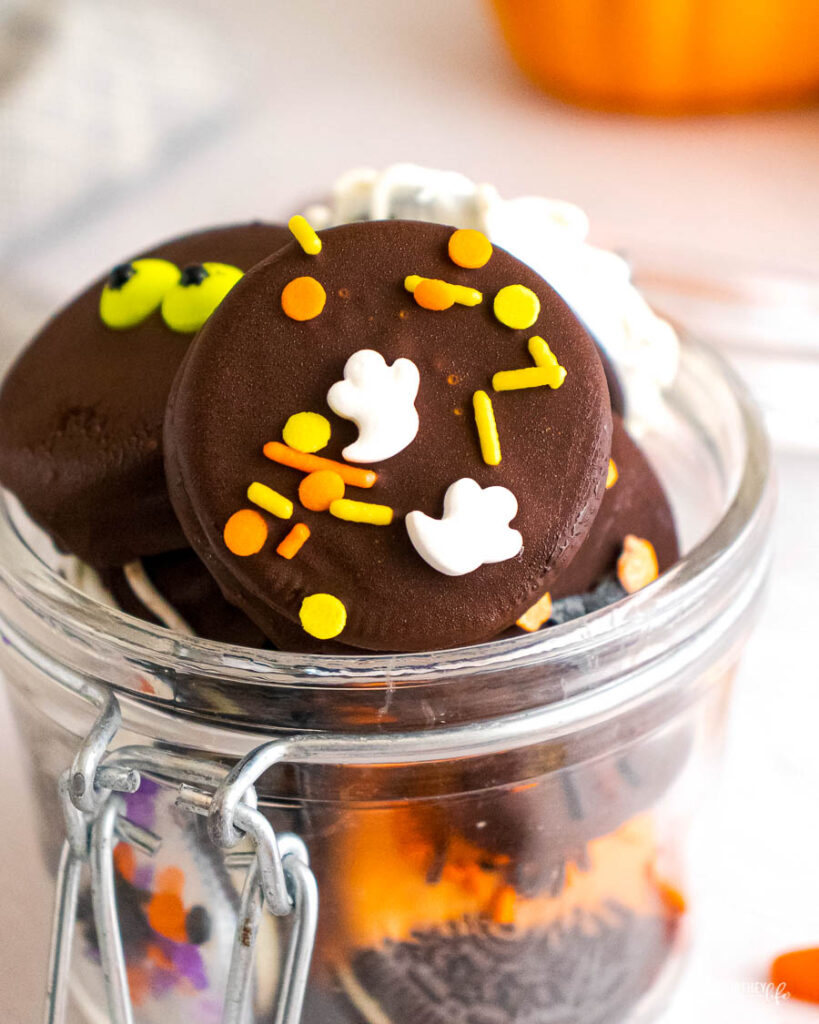
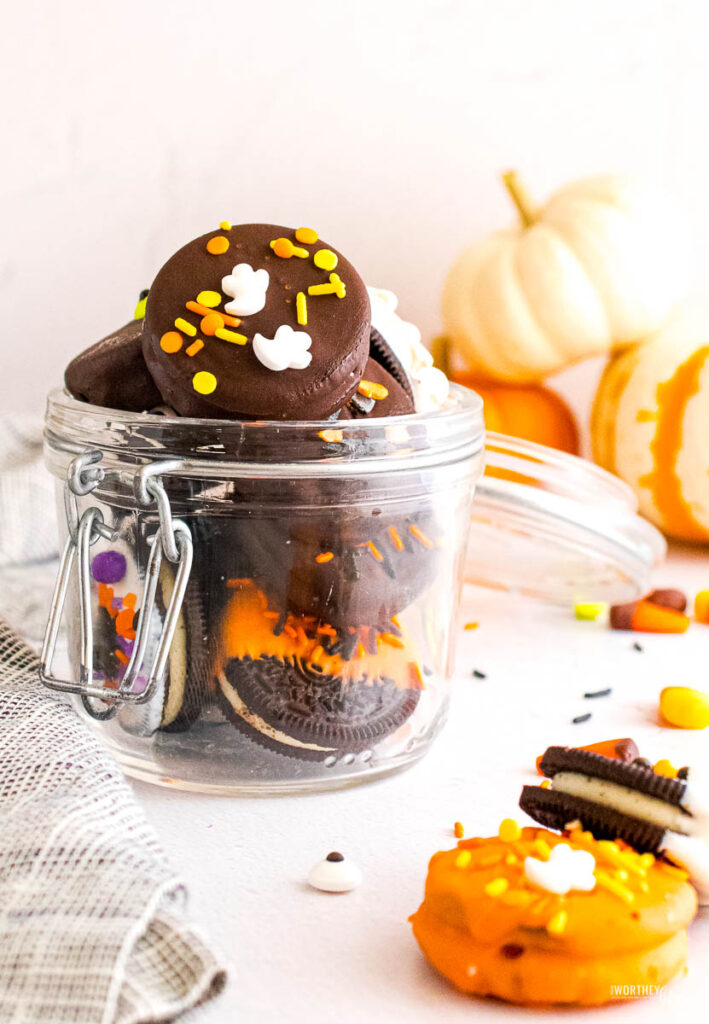
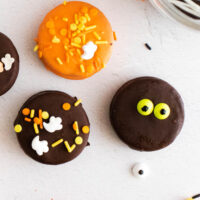
Halloween Chocolate Covered Oreos are festive and fun-colored dipped Oreos decorated with bright colors that scream Halloween.
A non-spooky no-bake Halloween dessert everyone will love to nibble on this holiday.
Oreo Halloween Cookies are fun to make, and even little kids will love helping add googly eyes, sprinkles, and more.
Get creative and create your one-of-a-kind covered Oreos today!
Halloween Chocolate Covered Oreos
I can’t believe we are already so close to Halloween.
If you are looking for a quick and easy dessert, I highly recommend this recipe: simple ingredients, minimal prep, and a tasty payoff.
Whether you’re taking them for an in-classroom treat or having an outdoor Halloween movie night, these are a fun treat to make.
And they are super easy to make. The kids can do it!
Craving More Halloween Recipes
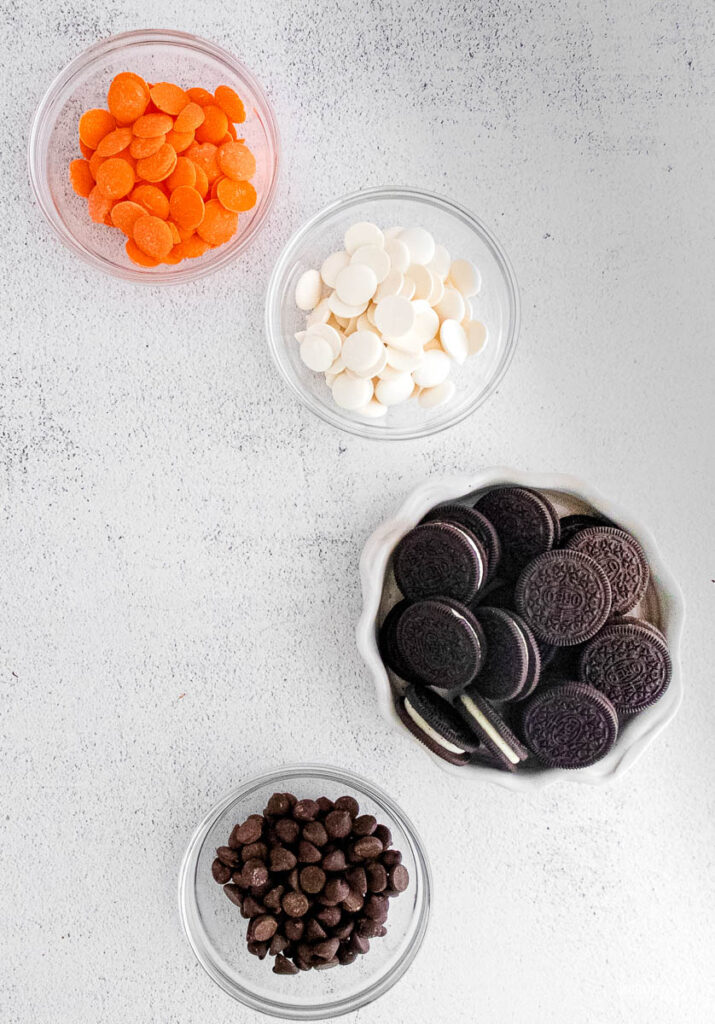
Ingredients Needed
Oreos. You can use any flavor of Oreos! If you get your hands on the Halloween Oreos, they offer a bright orange cream filling and are delicious. Or maybe you prefer a Golden Oreo. Go right ahead and reach for any of your favorites. Even Oreo thins are a great option.
Chocolate. I used chocolate chips and melting wafers. You must add shortening to the chocolate chips so the chocolate hardens the way it should. You can use a mix, as I did, or all of one type of chocolate.
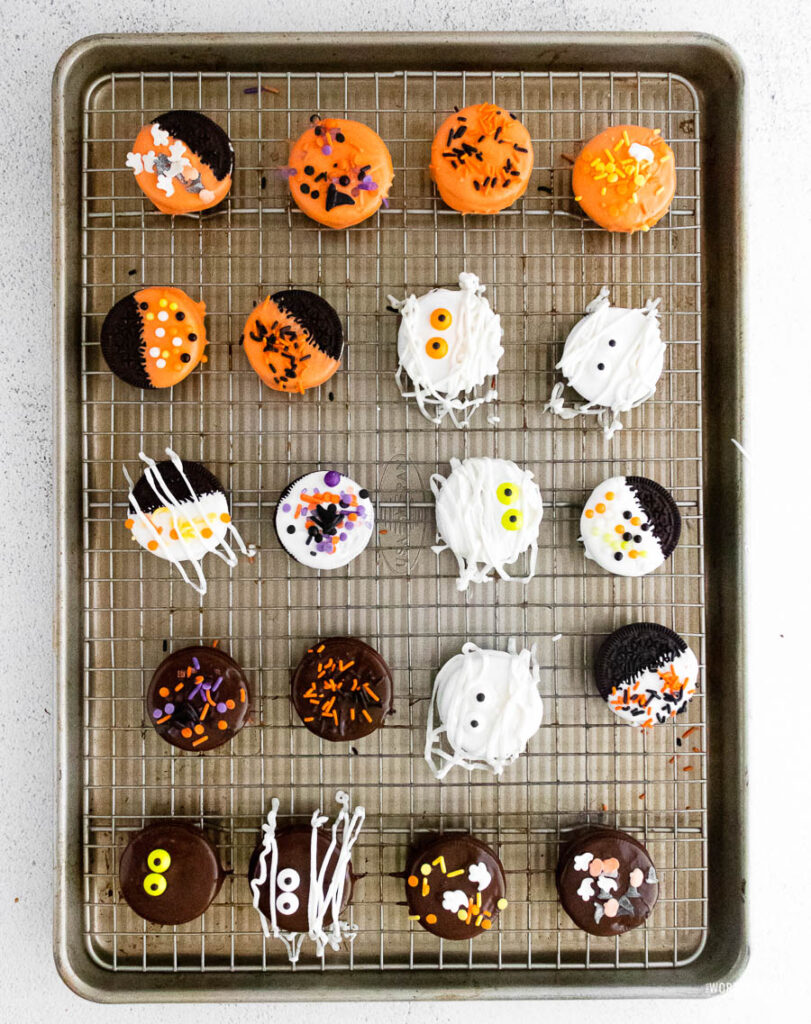
Sprinkles. Sprinkles, googly eyes, and all other ways to decorate the Oreos. Feel free to get creative or do something simple, if you will. I love bright colors; it just really makes these snacks stand out.
Ingredients
Cook Time: 3 minutes. Prep Time: 5 Minutes. Chill Time: 20 minutes. Total Time: 30 minutes.
30 servings per batch
- Approximately 30 Oreos
- 3 tablespoons vegetable shortening, divided
- 3/4 cup chocolate chips
- 3/4 cup bright white chocolate melting wafers
- 3/4 cup of orange chocolate melting wafers
- sprinkles to decorate
- candy eyes, to decorate
Directions:
- In a small microwave-safe bowl, combine the chocolate chips with 1 tablespoon of vegetable shortening—microwave on high for 30 seconds. Stir.
- Microwave for an additional 30 seconds. Stir again. By this point, your chocolate should be smooth and ready to dip.
- Dip the Oreos one at a time into the chocolate, flipping it over to coat the entire Oreo evenly. Use a fork to remove the Oreo from the chocolate, and tap the fork lightly on the bowl’s edge to allow any excess chocolate to drip off.
- Place the chocolate-covered Oreo on a parchment-lined baking sheet or a baking rack— this will keep it from sticking once the chocolate has cooled.
- Decorate the Oreo with candy eyes, sprinkles, or a white or orange chocolate drizzle. Make sure to add any decorations before the chocolate has hardened or won’t stick.
- Repeat with 9 additional Oreos.
- Repeat the same melting process for the remaining two chocolates. Place the finished Oreos in the refrigerator and allow them to chill for at least 20 minutes. This will help set the chocolate.
- Store in an airtight container in the fridge for up to 2 days.
How to Make Chocolate Covered Oreos
Lay out some parchment paper, and then work on melting up your chocolate.
If you are using chocolate chips, add the shortening.
I just headed my melting wafers and chocolate chips in the microwave.
Then Once the melts were melted, I did each Oreo individually in the chocolate.
Shake off the excess chocolate and place it on parchment paper.
Next, add on your google eyes, sprinkles, or decorate.
The chocolate will dry quickly, so decorate the cookies as you go.
Storing
You can store the cookies at room temperature in an airtight container for a few days.
If it is hot in your home, you can store them in the fridge to prevent the chocolate from melting.
In terms of freezing, these cookies can be frozen.
Place it in a freezer bag or container.
Freeze for 2 months, and then thaw at room temperature when you want to eat one.
The cookie can be slightly softer than fresh.
Expert Tips
- Make sure the chocolate is fully melted before you dip your cookies.
- When dipping, shake off excess chocolate by tapping the cookie gently as it is being held with a fork or dipping tool.
- Decorate your cookies as it goes since the candy melts harden really fast.
- Feel free to use white chocolate to replace milk or semi-sweet chocolate chips. Or do a handful of looks!
- You can substitute white chocolate for the candy wafers in this recipe, although white chocolate is difficult to melt and can burn easily.
- Candy wafers are highly recommended.
- Because the candy wafers harden so quickly, I recommended working with only one chocolate color at a time.
- You can substitute any color of melting wafer you have— green and purple would also be great for Halloween!
- If you don’t have colored melting wafers, add 1/4 teaspoon of gel food coloring for every 3/4 cup of the wafer.
- It is important to use gel food coloring as the liquid can change the melting wafers’ consistency.
- It would be best if you used vegetable shortening in this recipe. Vegetable oil and/or butter are not recommended substitutions.
- Lastly, the exact sprinkles you use are completely up to you.
- I find that a mix of black, orange, white, and purple give a real Halloween look! You can also usually find pumpkins, ghosts, and witch hats at craft stores.
Happy Halloween! Be sure to grab our free Halloween printables for kids!
Ingredients
- 3 tablespoons vegetable shortening divided
- 3/4 cup chocolate chips
- 3/4 cup bright white chocolate melting wafers
- 3/4 cup of orange chocolate melting wafers
- Sprinkles to decorate
- Candy Eyes to decorate
Instructions
- In a small microwave-safe bowl, combine the chocolate chips with 1 tablespoon of vegetable shortening—microwave on high for 30 seconds. Stir.
- Microwave for an additional 30 seconds. Stir again. By this point, your chocolate should be smooth and ready to dip.
- Dip the Oreos one at a time into the chocolate, flipping it over to coat the entire Oreo evenly. Use a fork to remove the Oreo from the chocolate and tap the fork lightly on the bowl's edge to allow any excess chocolate to drip off.
- Place the chocolate covered Oreo on a parchment-lined baking sheet or a baking rack— this will keep it from sticking once the chocolate has cooled.
- Decorate the Oreo with candy eyes or sprinkles or a drizzle of white or orange chocolate. Make sure to add any decorations before the chocolate has hardened, or they won’t stick.
- Repeat with 9 additional Oreos.
- Repeat the same melting process for the remaining two chocolates.
- Place the finished Oreos in the refrigerator and allow them to chill for at least 20 minutes. This will help set the chocolate.
- Store in an airtight container in the fridge for up to 2 days.
Notes
When you are dipping, make sure to shake off excess chocolate by tapping the cookie gently as it is being held with a fork or dipping tool.
Decorate your cookies as it goes, since the candy melts harden really fast.
Feel free to use white chocolate to replace milk or semi-sweet chocolate chips. Or do a handful of looks!


Leave a Reply