Our DIY Reindeer Wrapping Paper is an easy Christmas DIY project; plus, it’s creative and different!
Click through to get the supply list and instructions!
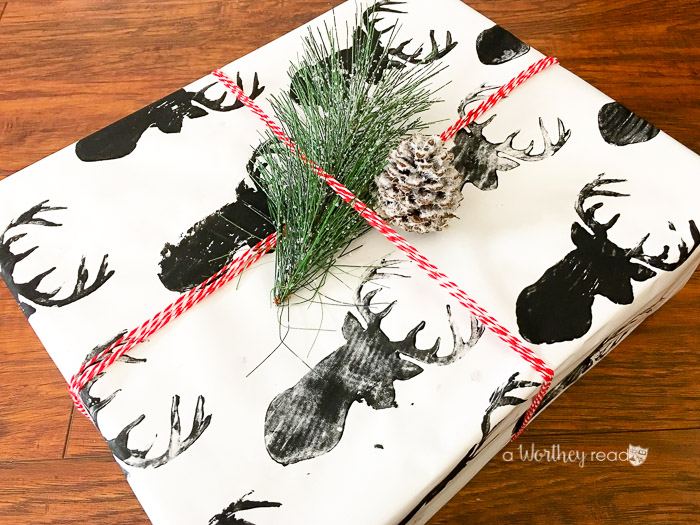
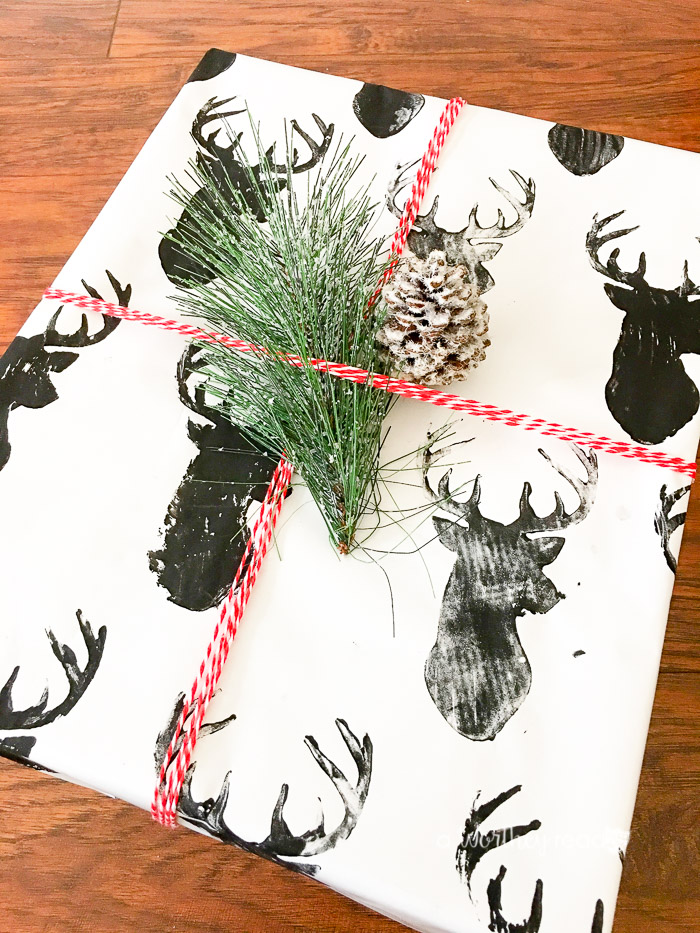
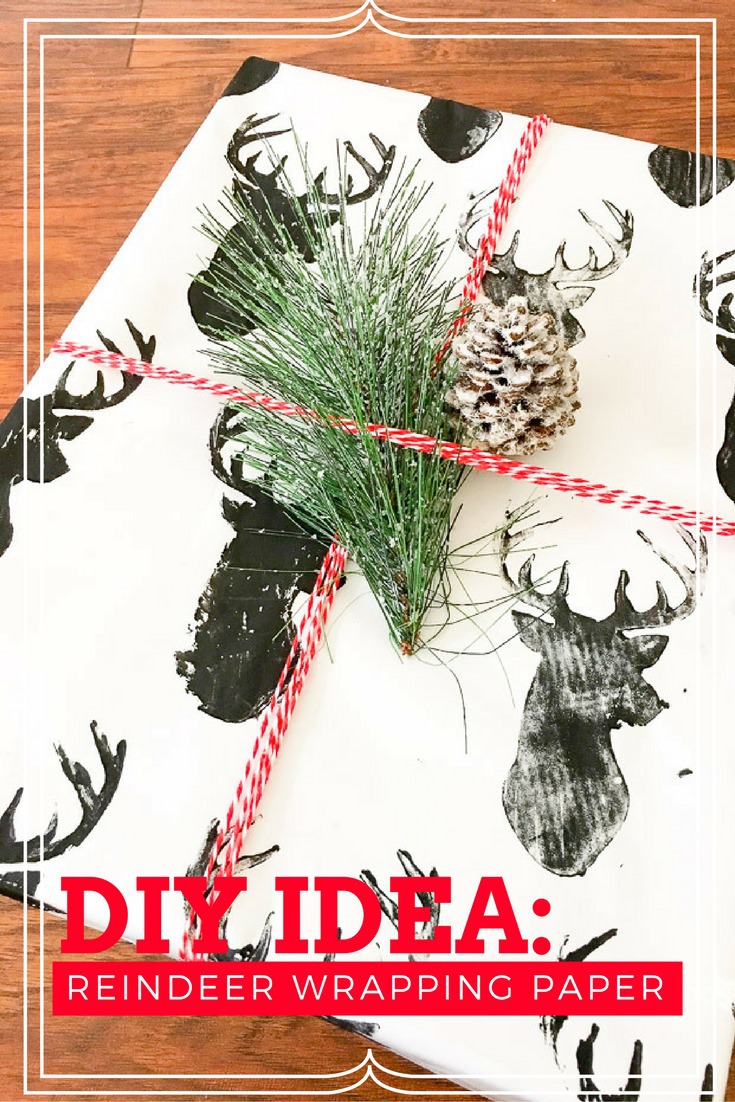
DIY Reindeer Wrapping Paper
Do you love to try new do-it-yourself ideas for Christmas? How about making your own wrapping paper?
Christmas is just around the corner, I mean literally. As I sit here listening to Stevie Wonder’s Ave Maria and watching the snow fall outside, it’s hard NOT to be excited about Christmas. I’ve mentioned many times that Christmas is my favorite holiday!
It does bring bittersweet memories of the loss of my parents and my Grandma.
Over the years, I have learned to appreciate the attention to the small details.
In the past, I would buy cheap wrapping paper from the dollar store (hey, nothing’s wrong with that), but I’ve become a little picky.
I think it comes from watching too much HGTV’s Fixer Upper! Either that or wanting things to look nice. I’ve never tried making my own wrapping paper, so this is a first.
I usually pick up beautiful, thick wrapping paper from Target, Meijer, or Hobby Lobby.
Last year, our theme was all about reindeer. Reindeer are still a hot Christmas decor theme this year, and if you love those little details, be sure to check out our easy DIY on making your own wrapping paper.
Supplies needed for this Christmas craft:

- Foam deer stamp (hobby lobby or get one here)
- Black craft paint
- Plain white wrapping paper
- Paper plate
- Paintbrush (optional)

1. Unroll your wrapping paper, squirt a tablespoon of your black paint onto the center of your paper plate, and use a paintbrush or your fingertip to spread it out evenly.
2. Press the foam side of your stamp into the black paint, making sure the whole stamp is coated in paint (or paint the stamp with your paintbrush).
3. Carefully stamp your deer head onto your paper, pressing down on each part of the stamp evenly. 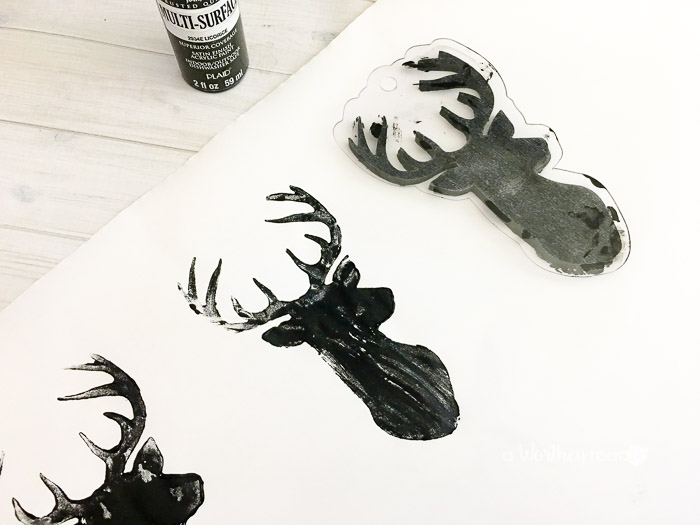
4. Carefully pull back on the clear backing and lift your stamp up.
5. Repeat steps 2-4, spacing each stamp in a layered brick pattern. 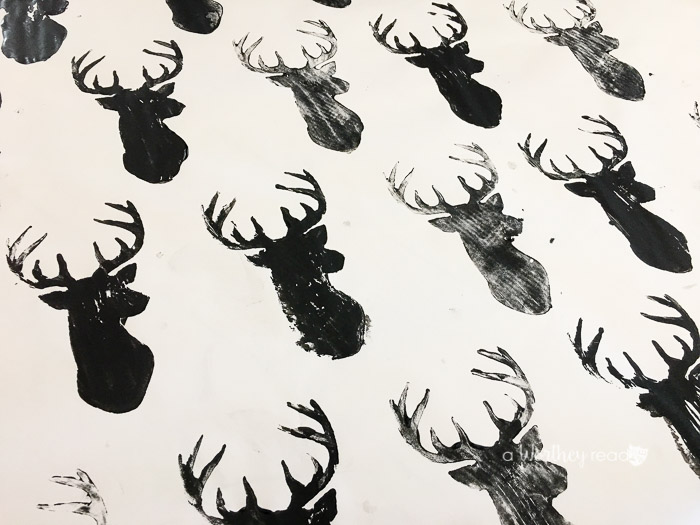
6. Let dry or use a blow dryer to dry quickly.
7. Cut your paper and wrap your gifts!
Merry Christmas!
Be sure to pin this to your Christmas Craft board:
Find more Christmas Craft ideas below:
DIY Coffee Mug With Vinyl Statement Using A Cricut


Victoria @DazzleWhileFrazzled says
Your wrapping paper is a definite step up from the Dollar Store paper I buy! Guilty. Nothing beats homemade and handmade, though. Visiting from Talk of the Town party.
Mandy says
This is so cute! It turned out so great! I’m going to save this idea for next year. I wish I had seen it sooner. I just found your blog and I’m already a big fan!